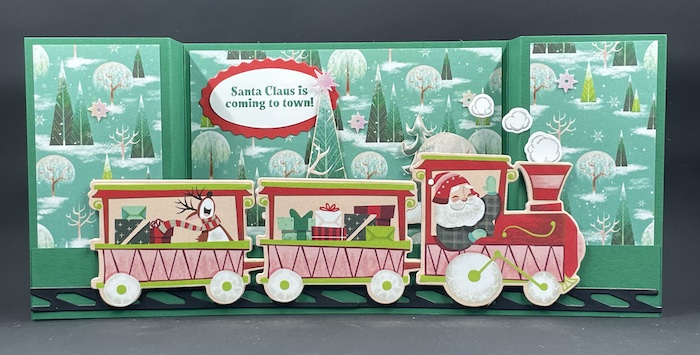
This card is a large bridge fold card that fits in a legal sized envelope. It beautifully highlights the Santa Express Designer Series Paper and how it works with the Santa’s Train Dies. Send this WOW card to your favorite people on your card list.
SUPPLIES
Stamp Sets:
Santa’s Delivery (159583) *Buy the BUNDLE and save 10% (159590)*
Ink:
Shaded Spruce Classic Ink Pad (147088)
Smoky Slate Classic Ink Pad (147113)
Paper (including cutting dimensions):
Poppy Parade Cardstock (119793) scrap (card base)
Shaded Spruce Cardstock (146981) 4”x 11”, 1” x 9”
Basic White Cardstock (159276) 4-3/4” x 3-3/4” (inside layer)
Petal Pink Cardstock (146985) 3 scraps approximately 3” x 2-1/2”
Basic Black Cardstock (121045) ½” x 11” strip
Santa Express Designer Series Paper (159582) Snow & trees landscape, 2 pieces 1” x 4”, 4-3/4” x 3-3/4”, scrap; Train sheet Santa, gift car, reindeer car
Window Sheet (142314) 1” x 1/8”
Accessories:
Adhesive Backed Stars (159965)
Double Oval Punch (154242)
Basic Supplies:
Paper Trimmer (152392)
Stampin’ Seal (152813)
Multipurpose Liquid Glue (110755)
Stampin’ Dimensionals (104430)
Bone Folder (102300)
Take Your Pick tool (144107)
INSTRUCTIONS
1. Use the Paper Trimmer to score the Shaded Spruce Cardstock at 2”, 3”, 8” and 9”
2. Fold this to form the bridge card base. Adhere Designer Series Paper to the panels of the bridge card as shown in photo.
3. Adhere the long Shaded Spruce strip to the bottom of only the outer panels on the card base.
4. Use the Stampin’ Emboss & Cut Machine to die cut two train track strips from Basic Black, 1 train engine from Petal Pink and two train cars from Petal Pink, plus a Santa train engine, a gift train car and a reindeer train car all from the Designer Series Paper.
5. Stamp the puffs of smoke on a scrap of Basic White using Smoky Slate ink. Die cut these also.
6. Use Multipurpose Liquid Glue to attach the train track to the bottom edge of the bridge strip.
7. Using Stampin’ Dimensionals, attach the Petal Pink train pieces to the DSP train pieces (this is simply to add stability to the train). Use Multipurpose Liquid Glue to attach the layered train to the bridge card.
8. Attach the two largest puffs of smoke to the card front as shown in photo. The smallest puff of smoke is attached to one end of the window sheet strip. Attach the other end of the strip to the back of the train engine as shown.
9. Stamp the Santa sentiment on Basic White scrap and punch with oval punch. Also punch out the scallop oval from scrap of Poppy Parade. Adhere these layers together and attach to back panel of bridge card.
10. Using pieces left over from the DSP, fussy cut a couple of trees and add to the back panel of the card using Stampin’ Dimensionals, overlapping the layered sentiment if desired. Attach Adhesive Backed Stars to the card front including the top of the fussy cut tree(s).
11. Stamp Merry Christmas on the Basic White rectangle and attach this to the back side of the bridge card. This layer is for your handwritten sentiment.
12. Decorate envelope if desired.