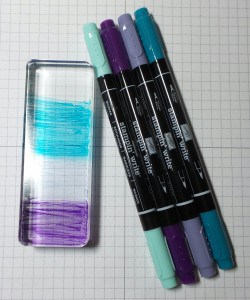
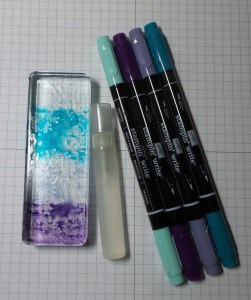
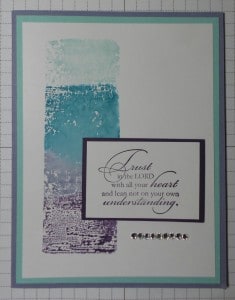
I love to add special details to my cards that are easy and that use supplies I have on hand. The watercolor background technique is very simple and all you need to create it is a clear block, markers and water. Here’s how it works…
Step 1
Grab an acrylic block and some markers and start coloring. I added my lightest color first and ended with the darkest color. You do want the colors to blend together, so if you put the lightest on first you aren’t going to contaminate your markers with darker colors.
Step 2
Spray a little water on the block with the spritzer. It produces a nice fine mist that is perfect for this technique.
Step 3
Stamp the acrylic block onto the cardstock. After it dries you are ready to finish your project.
The watercolor background produces a unique effect every time you use it. You can use it for a small portion of your card, or for the entire background.
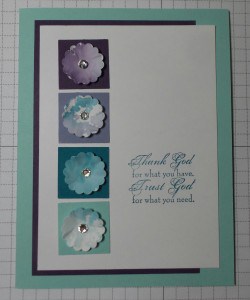
You can even create the technique on a piece of cardstock and punch or die cut it to create embellishments for your card.
I hope you will give this fun technique a try. If you do, please share your creations on our facebook page so others can be inspired by your creativity!
