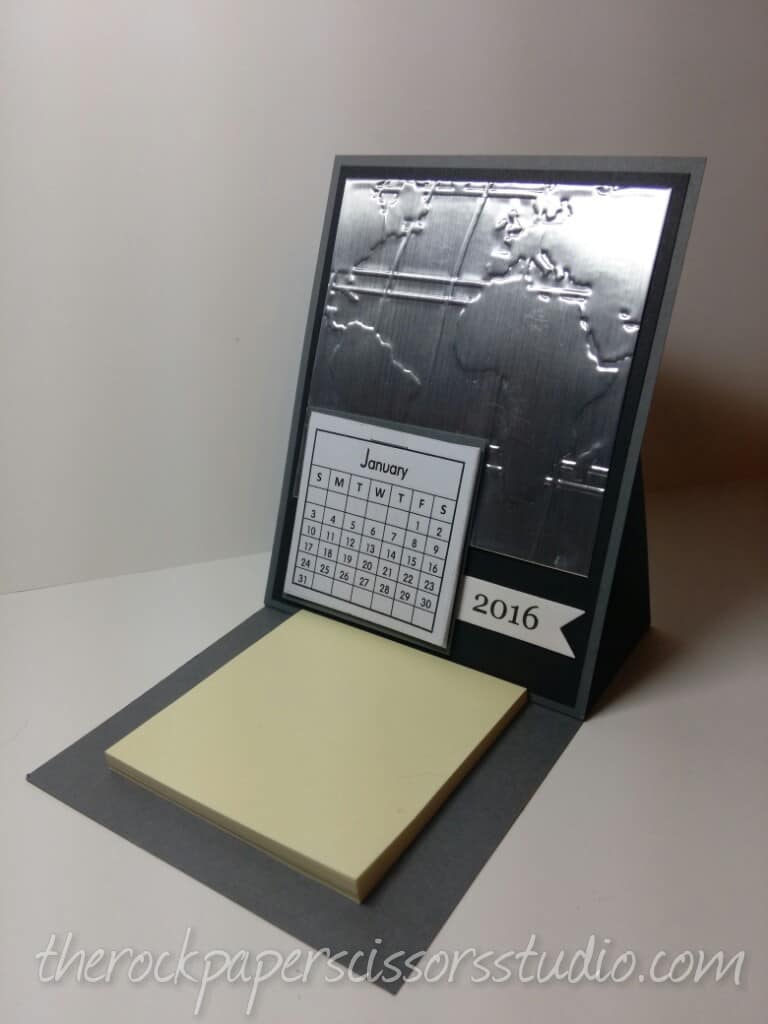
Here’s the Easel Calendar Card project that I agreed to share with you yesterday. I put these together for our Stampin’ Up! Demonstrator’s Christmas party and everyone loved them. They aren’t hard to make and are very useful.
Easel Calendar Card 2016
Supplies Needed
Basic Gray Cardstock (121044) 11 X 4 1/4″, 5 1/2 X 4 1/4″, 2 3/8 X 2 3/8″
Basic Black Cardstock (121045) 5 1/4 X 4″
Whisper White Cardstock (100730) 3 3/4 X 3 3/4″, scrap for date banner
Tear & Tape Adhesive (138995)
Stampin’ Dimensionals (104430)
Simply Scored Scoring Tool (122334)
World Traveler Textured Impressions Embossing Folder (138289)
Big Shot Die-Cutting Machine (113439)
You will also need these non-Stampin’ Up! items:
Metallic Contact Paper (I purchased this at my local home improvement store.)
3 X 3 sticky notes
2 X 2 calendar
stapler
Instructions:
1. Use the Score Tool to score the long side of the 11 X 4 1/4″ piece of Basic Gray cardstock at 5 1/2″ and 8 1/4″.

2. Attach 5 1/2 X 4 1/4″ piece of Basic Gray cardstock to the easel card front, BUT only adhere it on the bottom section as shown. this creates the base of the card and allows it to bend and achieve the easel shape.


3. Attach a square of metallic contact paper to the Whisper White cardstock square.


4. Run this through the Big Shot using the World Traveler Embossing Folder.

5. Attach this metallic piece to the top center of the Basic Black cardstock.
6. I purchased my calendar from this etsy shop for only $1. I printed the 2 X 2″ file and cut it at 2 1/4 X 2 1/4″. Stack and center your tiny calendar squares on the 2 3/8″ square of Basic Gray cardstock and staple together.

7. Attach your calendar to the card front using Stampin’ Dimensionals.
8. I printed the “2016” on my computer on Whisper White cardstock and cut it into a strip. Use your scissors to flag the right end of this strip and attach to card front as pictured.

9. Use some Tear & Tape to attach a stack of 3 X 3 sticky notes to the “inside” of the easel card. These sticky notes are what holds the easel calendar card up.
That’s it! The card will fold mostly flat and can be put in an envelope to give away.
If you have any questions about this project please let me know, I am happy to help. If you would like to order supplies to make one of your own, simply click the ‘Shop Now’ tab at the top of the page. Please share your creations with us. We would love to see how you re-create this project!